Traverser – Decision

Well, after testing both O and OO options and discussing these within the group, I have decided on the way forward. Now the good and bad news, the goodish news is that it will be OO, thanks Shaun and John for you input. The bad news is because of the current  lockdown and Peco being closed and shops without stocks of Code 75 Wooden Sleeper Flexitrack, this project will have to go on the back burner, although I will buy another traverser so that we are all primed and ready for a 20ft end to end, the two 6ft scenic boards being already finished.

UPDATE

After reading this ‘post’, a friend got in touch to tell me he had found a shop with some stock of Code 75 track. This track has now been ordered from Brett at Orwell Models Ipswich. Thank you Nigel for your help.

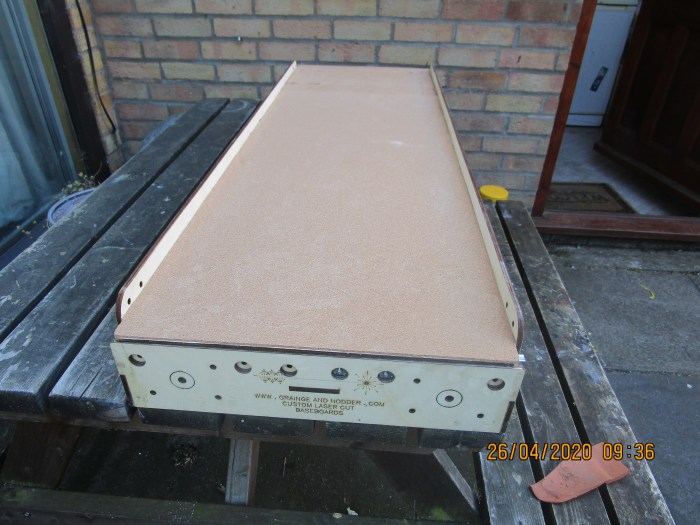
I have also now ordered a second traverser – delivery Mid June.

Traverser Options – OO Gauge

As I have some OO track I decided to ‘have a play’ with this gauge as well. Basically the same rules apply as when I played with O Gauge. Each track on the traverser must receive and dispatch trains.

You can get seven track on the traverser deck.


IMG_1583

IMG_1593 I found by using one OO right hand point – I was able to achieve the in and out rule easier – This just was not practical in O Gauge !

IMG_1594

How much will it hold? Obviously five tracks are the full 1200mm long with two slightly shorter due to the point.

The largest possible loco plus three Mk1 or Mk2 coach. Medium/small size loco plus four suburban coaches are just possible. Up to 10 small wheel wagons plus brake van.

IMG_1595

You would probably not need to add anything extra to the scenic boards in OO and the track is easily slued to the middle of the scenic boards.

I will post a third post in the next few days with not just my conclusions but with the  thoughts of the other members of our group.


Traverser Options – O Gauge

I have done a few tests on the use of the new traverser. I have split them into two different posts as both are still options for me although they have different issues.

Firstly O Gauge observations. This is all based on traverser size 400 x 1200 useable deck.

Will hold four tracks:-

IMG_1592

Above –Single track option ensuring all track accessible.

IMG_1597

Above — Double track option ensuring all track accessible – both in and out.

What is the capacity?

IMG_1590

Above — Should hold 2 x suburban coaches and large tank — 6 x four wheel wagons and small tank.

You will note that there is a space at the front of the traverser that could possibly hold another track – but this would not allow access in and out – just out only, and this was not my criteria.

I feel that I could add a scenic extra board to the standard 400 x 1200 base boards of about 100mm or so. This would push the track into a more central position.

below

IMG_1598


Grainge and Hodder 4ft Traverser

I purchased this kit before Xmas last year for a proposed project option for a fiddle yard. As I have no workshop as such I had to wait for the better weather to make it on our picnic bench (my outside work bench).

I found the kit quite easy to make, although I thought the instructions a bit lacking. It was about a days work which included some ‘glue drying breaks’ and the results are excellent. The laser cut system really works and the ‘runners’ are really top notch.

I modified the traverser with ‘stops’ to ensure better line ups.

These single units can be doubled up to make bigger units of  6, 7 or 8 feet.

IMG_1574

IMG_1575

IMG_1576

IMG_1577

IMG_1578

IMG_1579

I have been playing around with both O and OO track to see what possibilities were  available. I will post some photos and comments over the next few days.

The Cork is not included in the kit.

Mission Road Update – Posed Loco’s

Today I have been working on a few little tweaks. Buffer stop lamps added, Point Levers added with safety barriers, added extra piles of ash and blended, scattered coal on track near coaling stage,  added a water crane and a hand tap and hose.

As I came to the end of the day, I thought I would pose a few loco’s for the first photo’s of the Layout ‘in action’.IMG_1542

IMG_1547

IMG_1548

IMG_1554

IMG_1557

IMG_1558

IMG_1560

IMG_1562

IMG_1564

I have ordered several items to almost finish the layout – now in the hands of our Postman.

Mission Road Update (22.04.20)

The last two days have been spent hand painting the recently laid ballast, sand and scatter. I will further weather with an airbrush to blend everything together at a later date. For the initial painting I prefer using Acrylic as the undercoat and after drying a coat of Enamel. The main colours I use are Railmatch  ‘Sleeper Grime’,  ‘Weathered Black’,  ‘Matt Black’, ‘Matt White’ and ‘Matt Red’ . I can make and blend all the colours I need with these few colours.

All Buildings are now glued down, except the main engine shed which will remain loose to enable track cleaning.

IMG_1514

IMG_1517

IMG_1521

IMG_1522

IMG_1525

IMG_1526

Mission Road Update (20.04.20)

Well, that’s the ballasting finished and all but the points have been cleaned and picked clean of little ballast pieces that got in the wrong place! The points are still to do, for obvious reasons I take a lot more time cleaning them up.

The downpipes and capping has been completed on the large rear walls. Doing this really pulls the whole scene together, no join marks or crevices any more.

The bushes and other vegetation has been finished at the front of the layout against the small walling.

IMG_1499

IMG_1500

IMG_1504

IMG_1509

IMG_1505


IMG_1508

Mission Road Update (17.04.20)

Another update on the work being done at present, The retaining walls have now been glued in place after hand painting some distant scenes. I am in process of making some downpipes to disguise the joins. The wash out shed and the water tower have been ‘planted’ and I have given the layout a quick clean. The next big job will be ballasting, not a job I relish much, I will be using ‘N’ Gauge ballast and sand to do the job. It will all be weathered and blended later. I have also started on some vegetation in front of the low walls at the front of the layout.

IMG_1478

IMG_1479

IMG_1481

IMG_1482

IMG_1483

IMG_1484

IMG_1486

IMG_1487


Mission Road Update (12/4)

I have now completed the painting of all the Laser- cut Buildings and Retaining Walls. About 50% have had the mortar added and been weathered. You can certainly see the difference in the below photo’s. Coal has been added to the Coal Stage and Ash has been added to the Ash Bin. The plinth for the Wash Out Shed has been weathered and the Main Shed has had its plinth painted. I Have painted the ‘sky’ mid grey as I want the whole layout to depict a dirty run down place with lots of grime around.

IMG_1460

IMG_1461

IMG_1462

IMG_1463

IMG_1464

IMG_1465

IMG_1466