SM32 WW1 Sandbags and Barbed Wire

The sandbags arrived yesterday and the barbed wire this morning. The sandbags were formed into a barrier, painted, weathered and added to the layout. The barbed wire was worked into a spiral, a three cross and rod carrier made, painted and also added to the layout. The embankment on the back of the layout is now also nearly complete.

The troops are posed in their likely final position.

IMG_6122

IMG_6123

IMG_6124

IMG_6125

IMG_6126

IMG_6127


SM32 WW1 Templates for Ruined Barn

It was our original plan to cut three separate holes in the side of the Barn, but this was not possible due to the swing of the wagons and the width of the Tin Turtle. After much experimenting we had to have just one big entrance from the fiddle yard. This is OK looking from the side of the layout, but very open from any other angle.

I do intend to detail the inside of the barn with left over tools etc. This should at least give an insight into its original use.

IMG_6095

IMG_6096

IMG_6097

IMG_6098


SM32 WW1 Further Progress

A meeting this afternoon with Graham. He brought his ‘Tin Turtle’ with him for some gauging tests. A little trimming was required, but it soon had good clearance. We may still have issues with the tallest wagon required on the layout, to this end Graham has purchased a kit of an ambulance covered wagon so that we can test further. This part of the layout will now be left until we can test.

More work has been completed over the weekend including work on the back-scene, drainage ditch, rough ground between the ballasted area and the dilapidated barn.

One thing that I have tackled today is the track on the first board. We found out that the temporary narrow gauge railways of WW1 used unseasoned or dipped sleepers, so  they were basic wood colour and not the treated dark brown colour. I experimented and mixed up some basic wood coloured paint and painted the sleepers, when dry I added some Coloron Wood Dye over the paint. It seems to have worked, but I will check in the morning and add another coat of Wood Dye if necessary. I have also painted the track sides and highlighted the chair with dark rust paint.

Below are some photo’s in the order I completed them.

IMG_6012

IMG_6013

IMG_6014

IMG_6015

IMG_6016

IMG_6017

IMG_6018

IMG_6019

IMG_6020

IMG_6021

IMG_6022

IMG_6023

IMG_6024

IMG_6025

IMG_6026

IMG_6027


SM32 WW1 Layout – progress early July

The ballasting has now been completed on both boards – I will remind you that ballasting is made up of sand, grit, earth (wargaming war dirt and medium stones) and a little O gauge real ballast to top up. These railways were only used for two or three years maximum and anything to hand was used as ballast. I think the look is of a ‘temporary’ railway only.

The small drainage ditch along the front of the layout has been fashioned in cork and in real life even the soil from this was also used to ballast. Although the drainage ditch is only a scale 3′ wide, it will have water (varnish) added so it looks deeper than in really is.

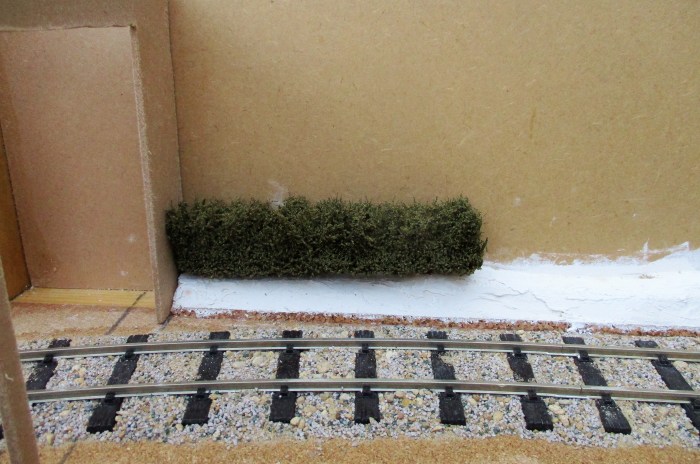
The next thing I tackled was the bank at the back of the layout. This was made from three layers of 1/4″ cork glued together and then shaped as required, it was then covered with a thin coat of Polyfilla. It will then be glued against the backscene, painted and flocked. The final part will be adding hedging, bushes and small trees, some photo’s show the hedging balanced on the bank to see the effect.

The final part of this update, was a decision that had to be made, and we have decided that the tracks that emerge from the fiddle yard will be through a dilapidated barn. When these temporary railways were laid, nothing got in the way and buildings just had holes knocked through to gain access and any original doors were simply taken off.

Having not modelled this gauge before, I keep the one wagon in my possession and a couple of scale solders on the baseboards  to remind me of what scale I am working in. The swing on the bogie wagon through the entrance from the fiddle yard has been checked, however we do not have the tallest wagon available and this does cause some height concerns!!!  The basic sides of the barn have been formed as a template and test fitted.

IMG_5998

IMG_5999

IMG_6000

IMG_6001

IMG_6002

IMG_6003

IMG_6004

IMG_6005

IMG_6006

IMG_6007

IMG_6009

IMG_6010


SM32 WW1 Layout All track now done.

After the arrival of the final piece of track and the two buffer stops this morning, all track laying is now complete.

The decision has been made to go DCC sound on all Loco’s and to also have a background sound system with the sound of a distant battle. We believe that the sounds are available and will start to progress a supplier.

We still need to sort out a coupling system and the entry to the sector plate scenic cover.

The ballast, I say that very loosely, has been obtained from the War Gaming World and expensive it was! Effectively ballast was not used and it was mainly stone and earth.

IMG_5853

IMG_5854

IMG_5855

IMG_5856

Work on this layout will slow down a bit now as I have fallen behind with O and OO amendments to existing layouts that appear at Exhibitions later this year. However, we have set a target date for the finished layout of 1/4/19 —- silly fools!


Baseboards for SM32 Layout

I have now finished the baseboards for our WW1 SM32 Layout. It has lengthened a bit from the proposed size, in fact it has grown from 7′ x 18″ to now being 11′ x 18″.

It is now two baseboards, one is 6′ long and the other 5′ long, including the sector plate.

I would emphasis that this is not a ‘trench railway’, but a behind the lines narrow gauge railway, just beyond the range of the German Guns.

Both Boards are lightweight Laser Cut Baseboards.

Below are some photos of the finished boards – track laying next. The track has been obtained and we now have four wagons and a ‘tin turtle’ petrol locomotive.

We have a couple of ideas for the track plan, one with and one without a point. A bit of trial and error game to follow.

The Wagons, Loco’s etc. proved no problem to obtain, but I am struggling to get suitable G Scale WW1 figures, the only purchase so far being the Bachmann offering – any advice gratefully accepted. And yes, I am definitely out of my comfort zone – but this project is different and ‘not another diesel depot’.

IMG_5785

IMG_5786

IMG_5787

IMG_5788

IMG_5789

IMG_5790

IMG_5791

I hope to do at least a monthly update on this project.