Work on N Gauge Layout (25/7)

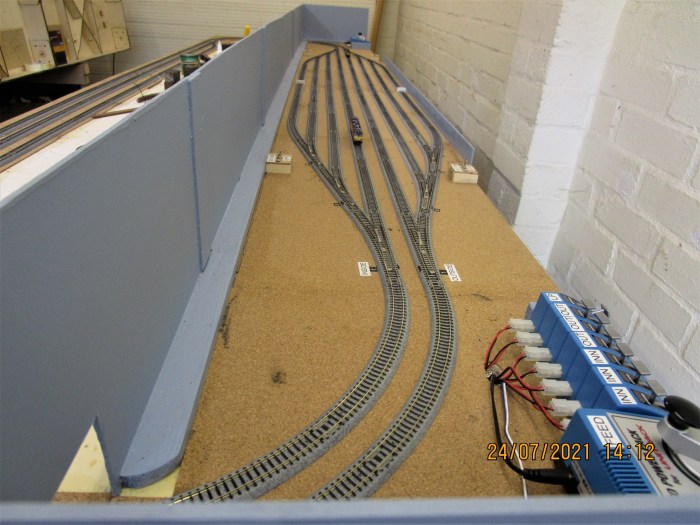
I am posting every move I make with the Kato track as it may be useful to others. Today I am preparing the track on the scenic sections for ballasting or should it be ballasting between the tracks and on the edges. I have purchased two packets of compatible Kato ballast to use, but at £7 a pack for such a small amount I decided to put a further layer of cork in all places that will be ballasted later to save on the amount of ballast needed. The below photographs show how I cut the cork to size, glued it and temporarily pinned it down, the pins are Peco and all are salvageable.

I intend to do a small section to see what is the best way to glue the Kato ballast down. I will use sandpaper to make a chamfer on all the cork on the edge of the track, this should help the finished appearance. You will note that I have started to disguise the wiring for the board joins.

Work on N Gauge Layout (24/7)

I have now finished all the wiring on the layout. All track is now pinned and glued, I have tested all options and the whole layout runs extremely well.

I really hope I can disguise the KATO oddities on the scenic sections.

As John is on holiday next week, I hope to do some renumbering and weathering in 16mm, 7mm and 4mm, quite a change from my last few weeks.

Turning the N Gauge Layout

Today John came down and we had a massive running session to ensure all was to his satisfaction. So that we could now start on the scenic section, we split the layout and turned it to make more room.

After turning we tested all tracks to ensure the move had not upset anything – all was fine – let scenic detailing commence.

Test Loco

Busy Day on N Gauge Layout

First thing this morning all the extra track turned up and I went straight out and fitted it all to the fiddle yard. I now consider that is the best I can do with KATO track system. During my learning on how to use the track I had assumed that they would produce various curved points! Sadly none could be found on any UK sites – so guess that they do not exist!

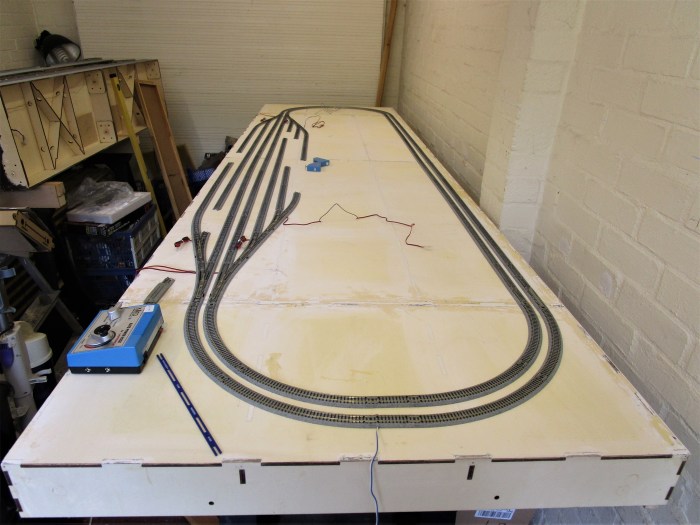
The final fiddle yard design finished, I made some between track templates based on the KATO point curved track supplied. Just to clarify, the middle six tracks are through tracks, the first and eighth tracks are sidings with a isolator halfway down each to hold two, two car DMUs etc.

The track will now be lifted and the backboard painted and glued down, after that the fiddle yard area will be corked. The track will then be relayed to the final design. I am looking to pin down the track if possible, if not I will have to investigate another way – we will see.

I had decided from day one of this project that I could not live with surface wiring and that all would be underboard. I also did not want to take the KATO point/power joiners off, I therefore investigated what was the smallest hole I could drill to allow the joiners to pass through, but still be out of sight and under the track. I think a 12mm or 13mm hole will do my wished for outcome.

At the moment I have not really decided on the viewable track at the front of the layout. I have had several ideas from friends including an extra curve in place to a few straights, a bi-directional passing loop or even a Stone Terminal. Whatever decided upon, the two main lines only will have overhead catenary.

Making scenic backboard.

Today I have been working on the scenic backboard, not an easy job with the rubbish wood I purchased from a large outlet. In the end I managed to get everything level on the backboard and also made a rear safety board to stop any fiddle yard accidents. I did have a few extra bits of track arrive today and they were duly put in place, the bulk of the extra track should arrive tomorrow.

The backboard is not glued down yet and will be painted both sides before fixing in place. Once glued in place I will temporarily take the track up and cork the whole fiddle yard.

Its Playday with N Gauge.

My Son John came over to see us today and brought with him lots of his N Gauge stock so that we could test the track and check the fiddle yard capacity with the stock. We had an excellent morning and every rake fitted as we had hoped for and the running was excellent.

I must admit that the Kato track has many good points, but there are a few downsides as well. The fiddle yard area gives us six through tracks and four sidings, two on each circuit. The six main lines will hold up to an eleven car Pendolino and the sidings will hold two, two car DMUs each. So that will give us 10 made up trains, this is way short of what it could have held if we had used Peco N Gauge track. The good point is being well spaced helps with the removal and replacing of stock.

The reason we have used Kato is that we have amassed quite a lot over the last ten years at very modest prices, although I am now purchasing a few bits at full price to complete the layout.

Well there you are – the good and down sides of Kato, no ballasting the track, point motors enclosed and very easy wiring against far less storage in fiddle yard using the same area.

Now working on the backscene between the fiddle yard and the scenic section – watch this space.

Potential Track Position

Even although the layout is still to be corked, I just could not resist having a play with a potential track layout. This is the first time I have ever used KATO track so getting used to it seemed a good idea.

As the track is based on, but not a copy of the track between Ely Station and the North Junction, the main operational significance is that it is ‘Bi-Directional’ on both lines. There are no crossovers in this length of track giving each track its own fiddle yard in model form.

With the cork arriving next week it is just ‘play’ and things are bound to change. One of the main things I need to do is to get some stock and test the fiddle yard capacity. I also need to purchase a little more tracks to fill in the gaps.

Trestle Extensions

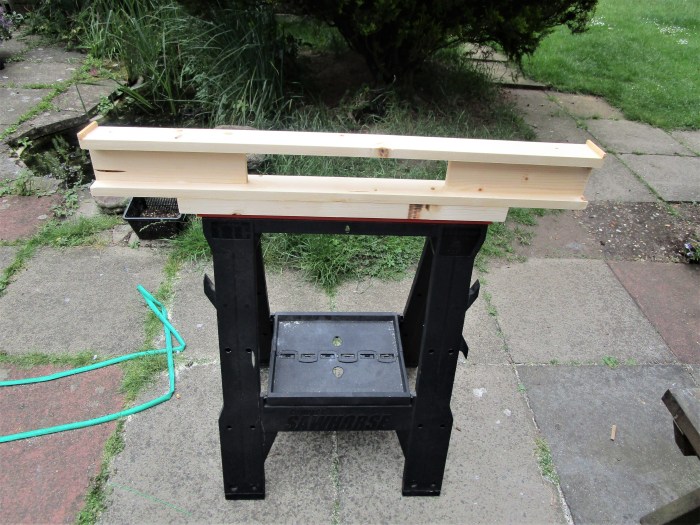
When you have two foot trestles and your latest project has a three foot width – what do you do? Well, I did not want to purchase new trestles and felt I needed to utilize the smaller ones somehow!

The below photos show how I made extensions for the two foot trestles to bring them up to three foot. I also took the opportunity to add extra height to the trestles to make a better viewing height for the layout. I use Black and Decker trestles (sawhorses), but I am sure this system could be used on other makes.

The materials for the extensions cost £50 and I made four trestle tops/extensions, that’s £12.50 each, a lot cheaper than buying four three foot trestles, if they are available.

N Gauge Baseboard Development

After making the two 1200 x 900 boards, it was decided to enlarge the layout and two more boards 900 x 400 were ordered. I knew the lead time for these boards was about six weeks when I ordered them, but I had little choice so I waited.

These boards turned up Tuesday and I made them straight away. Over the last two days I have added the new boards to the originals and each of the two boards now measures 1600 x 900. This makes the overall layout 3200 x 900.

The boards all went together really well. I doweled between the original boards and the extra boards to ensure they were very strong.