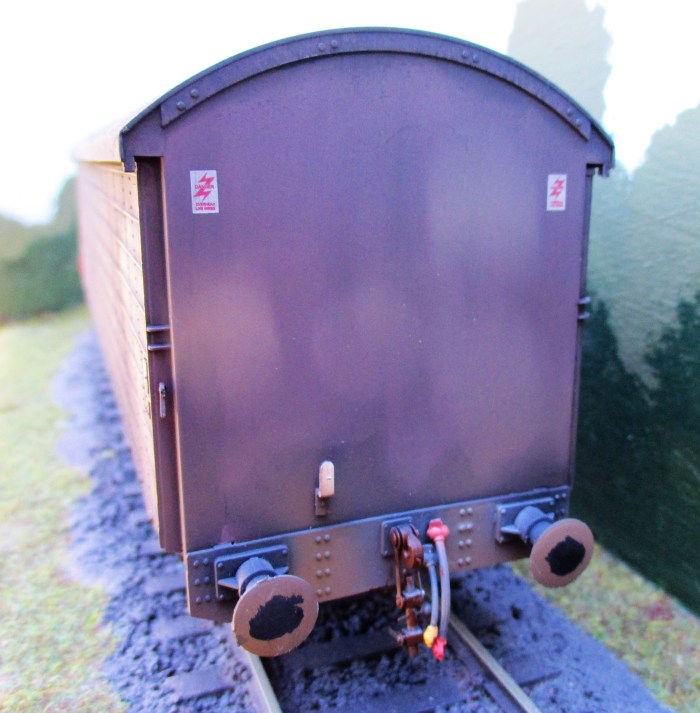
After much research and looking at photo’s, I have come up with the following weathering. I have taken a lot of care with the inside condition as these will run empty.


After much research and looking at photo’s, I have come up with the following weathering. I have taken a lot of care with the inside condition as these will run empty.

I have said two more wagons for Morlock Heath, but these will mainly been seen on Ashwell Moor, my sons O gauge stabling point that I made for him last year. I am hoping these wagons will also appear on Morlock at Exhibitions.
Again before weathering I put a light coat of matt varnish with a little matt white added, this just dulls down the brightness and gives a more care-warn look. after this the usual methods were used, shadowing followed by airbrushing, finishing off with a little dry brushing.
ZDA


VAA


There are several posts on the making of Ashwell Moor on this site if missed last year.

When Hattons produced their O Gauge Warwell, Graham purchased the Yellow and Red example. After research on its arrival we discovered that this actual wagon was a crane runner and had many added boxes etc. Undaunted we decided to continue on what was a ‘might have been’ wagon.
I weathered it and added a fictitious number. We displayed the wagon and a digger separately at several Exhibitions and it certainly caused many good comments, and nobody said that it was ‘fictitious’ ! So I can only assume it was a natural progression for the wagon type.
I duly purchased some chain and Graham supplied some ‘turnbuckles’ to use as tensioners. After some research I decided to do the following:-


. When I asked my friend Graham what colour he wanted the wagon painted. Black, Olive Green or Yellow/Grey. His reply was ‘rust’ !
Graham had seen a well weathered wagon at an Exhibition and asked me if I could have a go at getting it as disgusting as possible without going into fantasy.
After a base colour of black, followed by three washes of dilute enamel paints, I put the ground in rust on with designer gouache – here are the results after a coat of matt varnish to seal the whole wagon.


Sunday 3rd September was the debut of Morlock at Bressingham Gardens Model Railway Day. Here we have a selection of Photo’s taken by my wife during the Exhibition. Thankfully the layout run extremely well all day and many good comments were received. Special thanks must go to Graham, Shaun and my son John, they did the lions share of the operating during the day. We discovered a couple of issues with some wagons and a clearance problem with the connecting rods on the Dapol 08’s, these will be corrected by the next Exhibition at Bury St Edmunds this coming Saturday .


A bit of a milestone this post – it’s my 150th. I never thought I would do 50 let alone 150 – thank you all for making it worthwhile.
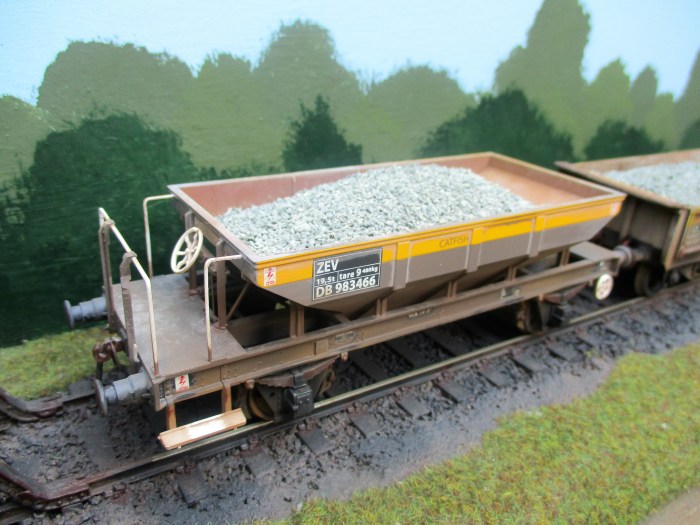
Anyway here we have two wagons obtained for Morlock Heath, a Turbot picked up from Ebay at a good price and a Heljan Catfish. I have weathered them over the last few days and here are the results.
Morlock Heath has it’s Exhibition debut at Bressingham Gardens Model Railway Day on Sunday 3rd September, quickly followed by Bury St Edmunds Exhibition on Saturday 9th.


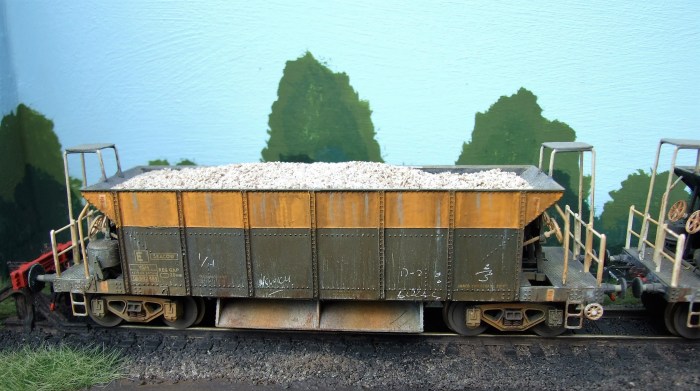
This is a rake of ten Bachmann PNA and other than my usual Spratt & Winkle fixed system between wagons, they are completely standard. The rake includes each style of side reinforcements, five and seven bars.
This rake is an exercise in weathering using ‘Designers Gouache’, which is a water based paint that behaves like an oil based paint. The best thing about these paints are that they mix very well. You can create depth and texture and if you don’t like your results you can wash it off with warm water. When you are happy with your results you make them permanent using enamel varnish. The only down side – they are a bit expensive for the best brands. I only use six colours!
As well as weathering the outside and underframe, I used this paint on the inside to look like wear and distress. I will eventually add some weathering powders to the inside of the wagons. I have tried to vary the amount of weathering so that the rake looks realistic.


I detailed these wagons about 25 years ago, before the better Bachmann and Hornby models were available. There is no way I am going to criticise these wagons, as in those days, they were the best we could get and if you wanted something better, then you had to do it yourself.
I have put these on as a separate post because they are an exercise in a form of weathering called ‘dry brushing’. I used Humbrol enamel paints for this exercise. How to do this has appeared many times in magazines and I will not repeat it. In my opinion they still stand the test of time, and still look very much at home on my garage layout.
I did make some basic mistakes when I detailed them, the main one was I used solid tops to the protectors instead of mesh – sorry. I also added some footsteps on the four corners. The hand brake wheels could also have been replaced with something more scale.
This a rake of five wagons.


This train is completely made up of Cambrian Kits. The train consists of 3 Seahorse, 1 Borail (Mullet) and 1 Salmon. All are very good kits that make up very easily in reasonable time. This is a more recent project, having been completed in the last two years. I used Railmatch Paints and Fox Transfers.
Cambrian have an excellent range of engineers wagons and I can not recommend them any higher.
I sometimes run this train with two other salmon, each fitted with two hi-abs. These are used to recover rail from the trackside. The Hy-Ab kits were available from Genisis Kits at the time.


In the early 80’s the GEML was being electrified and I used to visit my local station to see the Electrification train stabled in the old goods yard. On one occassion there was a Tool & Mess train stabled there. I thought that it would be nice to model something similar. I took a few photographs and then checked my model stock to see what I could make. At this point I realised that an exact copy of the train was not going to happen, but I could get close. A good supply of Engineers Olive was acquired, then the stock modified.
Considering this was nearly 30 years ago, the models still get good commemts at exhibitions.


