Six Minerals and a Brake Van in O Gauge

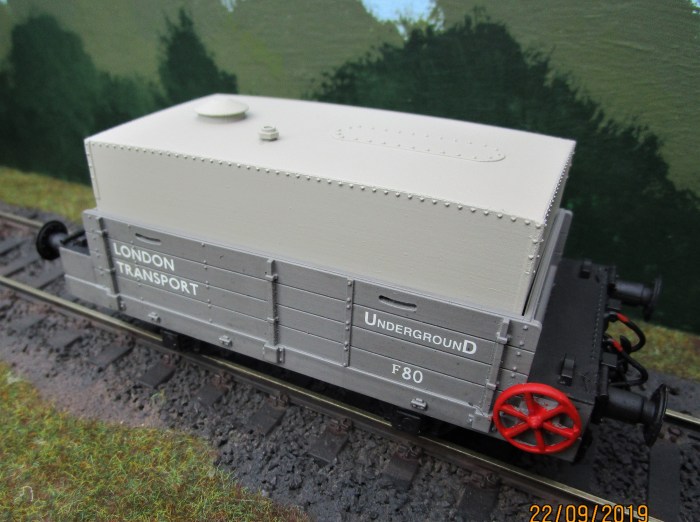
Here we have a rake of minerals and a brake van. I usually use enamel paints and a little talc for doing this job, this time I used some ‘liquid rust’ from a Military Modelling Shop.

I used as the instructions and slowly built up the layers to get different colours – the more you add the darker it gets and also the actual thickness becomes more 3D.

Yes, I enjoyed using the new liquid, but it is time consuming and the cost overall for the liquid is more than double the cost of enamel paints – worth it – definitely ‘yes’.

After looking at reference pictures, I was very tempted to do a 90% rust covering, but resisted this time!

IMG_0283

IMG_0284

IMG_0285

IMG_0286

IMG_0287

IMG_0288

IMG_0289

IMG_0290

IMG_0291

IMG_0294

IMG_0295

IMG_0296

Dark Lane LT – 1st stage weathering.

Over the last few days I have started weathering. This is the first stage and was applied with various washes and dry brushing. The next stage will be with the airbrush and then a few powders.

I have cut out and pasted a few houses and factories onto the backboard to portray a typical 60’s scene. I may ‘mist’ the whole backscene with the airbrush later to tone everything down even further!

No Buildings are glued down yet as the coaling stage and hut may be moved.

I am ordering about 20 sundry items to detail the layout and hopefully bring it to life.

IMG_0214

IMG_0211

IMG_0212

IMG_0213

IMG_0217

IMG_0218

Last two Ex GWR LT Panniers weathered.

The last two of my four LT Panniers have now been weathered. They will all run on my latest layout ‘Dark Lane’, a small LT depot. The first two below are L92 and L94, I have also put a single picture of L90 and L97 that have previously been posted. As the layout is based at the end of LT steam in 1968-70, all are in filthy condition and all Vacuum Brake and Steam Heating has been removed.

IMG_0122

IMG_0123

IMG_0124

IMG_0125

IMG_9864

IMG_9865

I hope to do more work on ‘Dark Lane’ very soon – especially weathering, to make it very dirty to match the Loco’s.

Busy Weekend with Morlock Heath

Over the weekend of 5th-6th October we Exhibited at two Shows, Sudbury MRC and GOG Meet at Bury St Edmunds. Both were very well attended and very enjoyable, special thanks to Shaun Harvey,  John Barnes and Barry Aldous for their help. On Saturday we ran Shaun’s Stock at Sudbury and on Sunday at the GOG meeting we ran mostly my stock. Below is a pictorial record of each day, thanks to Shaun and my wife for the photo’s.

SUDBURY

_SRH3600[4462]

_SRH3626

_SRH3615

_SRH3606

_SRH3581[4459]

_SRH3571

BURY ST EDMUNDS

_SRH3660

_SRH3647

IMG_9901

IMG_9914

IMG_9903

IMG_9910

Dark Lane – London Transport.

This is my first post on my latest layout ‘Dark Lane’ it is based on a scenario in the late 60’s on a small London Transport Shed and Sidings. The layout is DCC fitted and the loco’s, four Ex GWR Panniers, are DCC sound fitted. I have six appropriate LT wagons at present but another two or three are needed.

You will see from the photo’s that I have made quite a bit of progress although I would say its only about 50% finished.

The baseboard and fiddle yard is one piece to an overall length of five foot and six inches, just over four foot being scenic. All buildings and walls are ‘laser cut’  and have been painted with acrylic paints. The cement is very dilute ‘polyfilla’ rubbed into all crevices, the whole area is then coated in wood stain after cleaning off the excess polyfilla.

IMG_9849

IMG_9851

IMG_9857

IMG_9854

IMG_9859

IMG_9860

IMG_9864

IMG_9865

IMG_9868

It is my intention to make this a very grubby layout, hence the heavy weathering on the loco’s. The controller is a Digitrax Zephyr purchased from Coastal DCC at Ipswich.


Four OO Diesels weathered

I have had these Loco’s since May this year – they were brought over from Australia by my mate Graham. Although I was under no pressure to get them done, sadly I let them drag a bit. Anyway here they are, awaiting onward shipment to Australia.

08954

Straight forward renumber and medium weather and detail.

IMG_9778

IMG_9779

37716

Light weathering and further detailing after a complete repaint by someone else.

IMG_9780

IMG_9781

37099

Weather and detail standard Bachmann Loco – word of warning here – this loco did not like the ‘wash and wipe’ method, and when wiping some of the tampo print lifted. I had to buy a complete set of transfers to make the repair.  This is the first Bachmann Loco I have ever had this problem with! Note this Loco does not have the usual nose aerial.

IMG_9782

IMG_9783

47245

Straight forward light weathering and detail.

IMG_9784

IMG_9785


Three O Gauge Kit Built Wagons.

Here are three wagons that are awaiting weathering and will be finished within the next few days along with another five or so wagons.

Bogie Bolster

This is one of Jim Mcgowans brass kits made by Mike quite a long while ago. After a good clean and undercoat it was painted and transferred as per instructions.  The bolsters and the uprights remain loose so that different loads can be carried.

IMG_9763

IMG_9764

IMG_9765

IMG_9766

LT Tank Wagon

The next wagon is a Radley Models LT underground wagon – it started life as a ballast wagon and ended up as a Tank wagon after several conversions. This wagon is destined for my new LT layout ‘Dark Lane’.

IMG_9770

IMG_9771

IMG_9772

IMG_9773

LT drop sided open wagon

This is an ex Midland Railway vintage wagon from a Slaters kit – these wagons were very long lived and used for everything from ballast to rubbish. Towards the end they were depot based and used to dump almost anything.

IMG_9767

IMG_9768

IMG_9769


O Gauge Steam Locomotives ‘Update’

Below are some loco’s I have been working on over the last few months.

Gresley N2 (NON CONDENSING)

This Loco represents a Parkeston Loco during the mid fifties – This Loco was swapped for an amount of weathering services. I have added extra lining and some more detailing.

IMG_9695

IMG_9696

IMG_9697

C12

A recently purchased item – Extra detail added and varnished in a satin finish. This is modelled as a Bury St Edmunds Engine.

IMG_9698

IMG_9699

IMG_9700

K1/1 MacCailin Mor

This was an Ebay purchase of a basic engine – it certainly had room for improvement.  I purchased over £30 worth of detailing items – added them and a partial repaint followed.

IMG_9701

IMG_9702

IMG_9703

B17/4 Helmingham Hall

This was the Loco that arrived badly damaged. After repair I worked out all the detailing parts it required and purchased nearly £50 worth. After adding the extra parts, I did a complete repaint. The model is when it was an Ipswich engine – mid fifties.

IMG_9704

IMG_9706

IMG_9707IMG_9705

All will be light – medium weathered later.