My previous post shows my attempts to pull around a factory weathered Class 33 – I said at the end I was still not happy and would revisit the project —— I am doing that now – more photos in the morning of hopefully a better attempt – nothing is ever finished until you are happy with it.
Uncategorized

OO layout – Posed Loco’s
Well, I just could not resist putting a few Loco’s on the first board of the new OO layout. I have also added a gradient board and a speed limit board.


Share this:

And then there was three.
Taking advantage of the warm weather and the non arrival of some bits I am waiting for to continue the OO scenic layout.
I had three 4′ x 15″ laser cut baseboards, I also had three small fiddle yards in kit form. The fiddle yards (sector plates) were made up and attached to the already made baseboards. I have experimented with the lengths of the fiddle yard sector plates by adding extra pieces onto the original kit item supplied.
This is not the first time I have used this method to make small layouts, and an earlier post shows how I did the conversions.
Two of the three layouts still have options to have another ‘bolt on’ baseboard added so that the scenic area could be doubled. One has had backboards added already and will remain this size.
The baseboards are from Grainge and Hodder.
The Fiddle Yards are from Norfolk Heathworks.
I have no real quick plans for these layouts except to say, one will be OO, one will be HO and one will be O gauge. I hope to start at least one layout during the Autumn.


Share this:

OO Scenic Sections joined and Engine Run.
Well quite a lot of work done on the scenic boards of the new OO layout. The backboards were undercoated, it was electrically joined and the last bit of track was glued down and copper clad sleepers added on the end.
I cleaned all the track, and then run an 08 shunter on both lines and tested the whole tracked area.
While I want the layout to be very rural with very few buildings etc. I do want a focus and thought that a farm would be nice without breaking my overall aim of ‘running trains through the countryside’ . I have a lot of farm buildings that I was given when I helped break up a layout for a friend, and they were found and placed on the layout for assessment. I am not totally convinced about the buildings but planning things is still in the early stages.


Things will slow down a bit now as the second traverser is still three weeks away !!
Share this:

Adding Backscenes to OO Layout.
Last couple of days spent on adding 3mm MDF Backscenes to my two scenic boards for the OO layout (still no name).
Still waiting for 2nd traverser kit to turn up, so fill in jobs being done a little out of order.


Share this:

The two scenic boards on OO Layout
It has been a very busy day outside today – pleased to find some shade most of the day I have now married up the two scenic boards and I now have the rails over the join – I used copper clad sleepers on the edges to reinforce them.
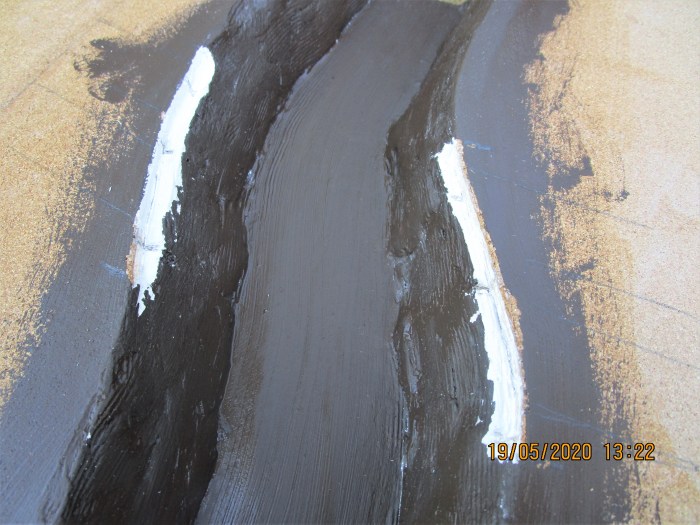
I then turned to the river. When I cut the river out of baseboard, I kept the piece cut out – this is trimmed to the size of the bridge and then ‘let in’ to the edges of the river.
I then finished all the track laying according to my plans and advice from our group members.
Here are a few photos in sequence of todays work.




Well that’s about it for now – the second traverser is still about a month away, so apart from a few electrics on the two track join and possibly a little landscaping, that’s it.
Share this:

Making a river on new OO layout
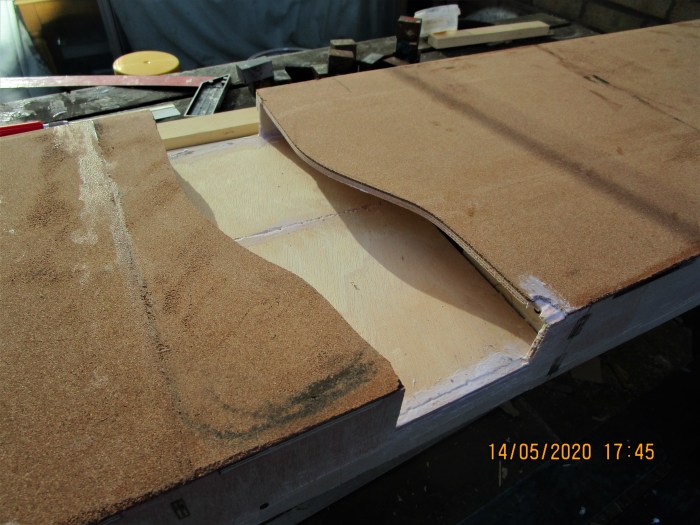
I have managed to take photos of the methods taken to make a river. Firstly I need to say, I used this method as I wanted to add to the integrity of the baseboard. Polystyrene would be my preferred method, but that would not enhance the strength of the baseboard. Before cutting the river shape out of the baseboard, I re-enforced the lowest level with 2″ x 1″ softwood, this will be the main strength of the baseboard after cutting. I then cut the river shape and added the river base.


The next thing I did was to cut stout cardboard to form the inner banks. I then made some templates to the actual formers. After that I added re-enforcing strips between the formers.


After letting the whole thing dry overnight, I stuffed the spacers with newspaper. Finally I added a coating of ‘polyfilla’. After leaving overnight again, I smoothed the whole area down with a small file and sandpaper, after vacuuming and cleaning up I applied a coat of brown emulsion paint.


I now feel comfortable with the strength of the baseboard. But again I will say that lighter materials will be used to form other undulations on the boards.
Share this:

Strachan Remembered -No. 2
After recently posting some photos of Strachan and a conversation on the phone with Les Williams, here are some more photos Les sent me. Great Layout that we made over 20 years ago and kept in great condition by Les.


Share this:

Traverser/Board one electrics done.
Over the last two days a lot of work has been completed, not least the electrics. A Gaugemaster DC twin track controller and track cleaner has been used, both retrieved from an old layout. The centre three tracks have been split with isolation to allow a total of ten trains to be stored on the traverser.
My method with the electric’s is to have all the tracks on one side permanently coupled (the blue wire) with the full contact on the other track being made by the bolt and loops (the red wire). Simple but it works.
All the track on the first scenic board has been laid and the controller etc. installed. The back board scenic board bases have been added. The second scenic board has been started with a cut out for a river.
The second traverser is not due until Mid June – so after further work on the river and adding track – I will have a break from this un-named layout



Share this:

Six Inch extension to the Traverser.
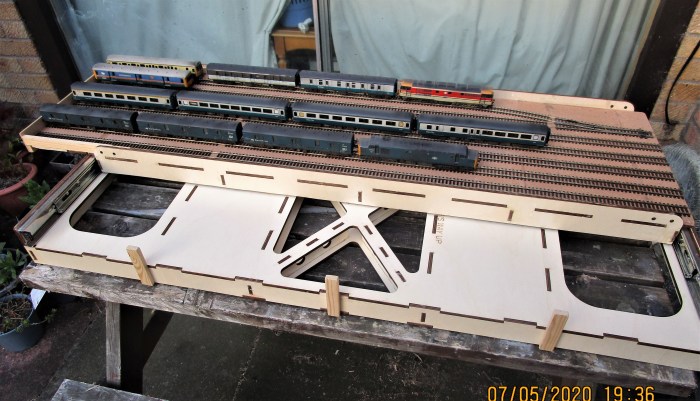
Well, its been quite a day, I turned the four inch extension into a six inch one. I then glued the extension to the traverser, thankfully it worked well. This was first thing this morning and after it was all dry I still had plenty of time left to do some track laying. Out came the gauges to ensure all was equally spaced and track laying commenced.
Below are some photographs of my attempts, the track is lightly pinned so that adjustments can be made, the track will ultimately be glued down when I am 100% happy!


Very happy with the outcome ——–but I have an idea to add another extension to the other end – This is a far more difficult proposition as it needs to be extremely precise.
I have also encountered a possible balance problem when the deck is fully extended – some lead ballast in the base may be necessary.
