Update on O Gauge Fuelling Point (Ashwell Moor)


Work over the weekend was moving the Stabling Point to a Fuelling Point. Extra cork has been laid to increase the size of the ‘concrete’ hard standing. I have also put Balsa wood down to form the fuelling area. Some drains will be added between the tracks later. I took the opportunity to spray between the tracks on the fuel line with ‘track dirt’ and matt black.

I have added a rear wall to the Scenecraft fuelling point as only a one track operation is needed – this was some leftover bits from my terminal station walls.

I have ordered some more items to add to the working look of a busy fuelling point. – to be added later.

DSCF5421

DSCF5422

DSCF5423

DSCF5424.JPG

DSCF5425

DSCF5426

I have now undercoated the complete ‘concreted’ area.

DSCF5427

DSCF5428

Re-think on O Gauge Stabling Point

After much discussion with my son it has been decided that the stabling point will become – a fuelling point!

This is not a big change and it does not require any track relaying. We have obtained a Scenecraft  Fuelling Point and a Hampton Hill platelayers hut to add to the layout. Actual placement will be decided later but the modifications required are being planned.

We have also added a 1″ square piece of softwood to the front of the layout to enable a curtain to be hung at exhibitions.

The layout also now has a name —— Ashwell Moor FP

DSCF5389

DSCF5390

DSCF5391

DSCF5392

DSCF5393

More O Gauge Loco’s for Shaun


This is the second pair of Loco’s I have weathered for Shaun. Both are light to medium weathered and are standard DC.

Both Loco numbers were picked for their longevity in the appropriate livery.


Dapol 08 – D3045

DSCF5400

DSCF5401

DSCF5402

Heljan Class 31 – D5593

DSCF5408

DSCF5405

DSCF5406

DSCF5407

DSCF5409


O Gauge wagons for Graham M

These three wagons were all made to a very high standard by Graham and then passed to me for painting and weathering.

Although a quite diverse batch covering over fifty years, they all required separate research on actual liveries and weathering.

For the first time I have taken ‘before and after’ photographs.

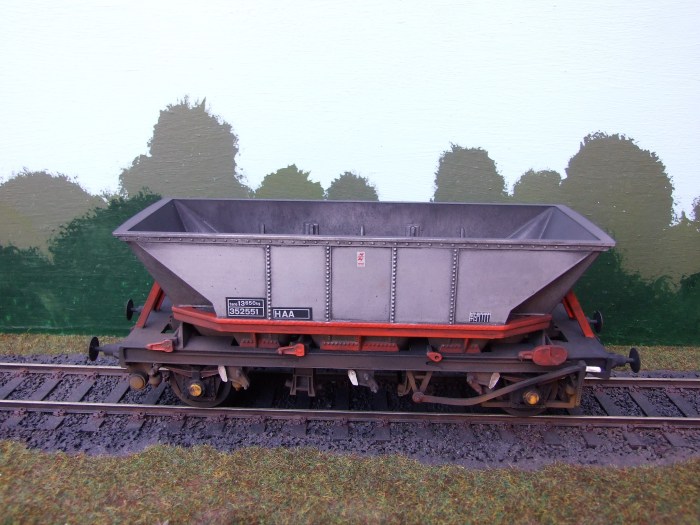
HAA – Medium Weathering – SKYTREX MODELS KIT

DSCF5376

DSCF5377

DSCF5379

DSCF5380

DSCF5381

ZCV Tope – Light Weathering – GJH KIT

DSCF5374.JPG

DSCF5375

DSCF5383

DSCF5384

Single Bolster – Light to Medium Weathering – CONNOISSEUR KIT


DSCF5373

DSCF5386

DSCF5387

DSCF5388

An O Gauge Stabling Point

This layout was a plan developed my son and myself to enable him to run his O gauge diesels in a relatively small space.

As I am half way through making my late 60’s station layout, any work needed to be done relatively quickly. I decided that it could be done in a fortnight, at least to a runable stage. Any scenic work would/could be left until a later date.

Two 4′ x 15″ laser cut baseboards were ordered and after arrival we put them together on Sunday 11th June. It is now Saturday 24th and I am pleased with the progress,  everything is finished to the point I wanted apart from the isolating sections. only the lack of on/off switches has stopped me from completing the challenge.

The layout will hold up to five shunters and nine mainline loco’s. Any two shunters can be substituted by one mainline loco.

I hope we can finish the layout scenically within three or four months, but that very much depends on the progress with my other layout.

DSCF5358

DSCF5359

DSCF5360

DSCF5361

DSCF5362

DSCF5363

DSCF5364

DSCF5365

DSCF5366

DSCF5368

DSCF5371

O Gauge Loco Coaling Stage

This is another attempt at distressing a Laser Cut Wood Kit. Again it was painted with acrylic brown paint and weathered with dilute enamel black. I then used the same method as the previous platelayers huts. This time the planking runs across, so the scalpel was used in the other direction. a couple of coats of wood stain then followed.

DSCF5273 (2)DSCF5341

DSCF5355

DSCF5356


DSCF5357

O Gauge Coal Merchant

Again not quite finished, this Coal Merchant’s has been made this week using a Laser Cut kit, but a card cut instead of my preferred wood.

I find the laser cut card kits more difficult to distress and I usually revert to my usual weathering methods with enamel over acrylic.  I also find my method of doing mortar using poly filler harder to do with Card Cut Buildings.

I always use real coal for O gauge projects, although I have been known to use O gauge ballast, painted black and flicked with gloss varnish. The number of times I see layouts with coal merchants with just one grade of coal, Realistically most had at least two or three. I went for Lump, Household and that horrible Nutty Slack!

To keep the weight down on my models, I used balsa wood for forming the coal mounds.

When the Model is eventually planted on the layout it will be blended and sacks and a coal weighing machine added.

DSCF5301

DSCF5302

DSCF5338

DSCF5340

DSCF5350

DSCF5351

DSCF5352

DSCF5353

A pair of Platelayers huts in O Gauge

Although not quite finished yet, I thought I would share these laser cut kits I have built and painted this week.

I have tried to give the wood a distressed look rather than a straight weathering. This was achieved by firstly painting them in acrylic brown paint and them scratching a lot off with a scalpel, coating with wood stain and then varnishing. The chimneys were painted and then the bricks picked out with poly filler for the mortar, this was also stained.

DSCF5334

DSCF5333.JPG

DSCF5332

DSCF5335

Hornby OO D16/3

Final loco in this batch is a D16/3. What a great model this really is, it portrays them as I remember seeing them at Norwich in the late 1950’s. Occasionally you could see them  after a cleaning, but that did not happen much towards the end.

There are plenty of black and white photographs, but a lot less full colour. However I managed to track down a few in the condition I required. Here are the results-

DSCF5322

DSCF5323

DSCF5327