New Book on Tivetshall -Beccles Line

As a famous TV program once said – ‘and now for something completely different’.

Yesterday I purchased this book from Bob Pearman Books as it was local to me and I worked for 30 years near the original route of this line ‘ The Waveney Valley Railway’.

This is truly a magnificent Book by Peter Paye a truly excellent researcher. On arriving home I had a quick glance through the book and in the section on ‘bridges’ I remembered something! About 20 years ago I purchased a bridge plate for £5 that was supposedly from the Waveney Valley line. Having no way of researching at the time it has just been moved around various Sheds, getting dirtier and covered in cobwebs.

In fact I never knew whether the number was 1191 or 1611. It turns out to be 1191 and was on a bridge between Bungay and Ditchingham. Mystery solved at last thanks to this very informative book. By the way the plate is still in very weathered GE Livery.

IMG_8950

IMG_8951

IMG_8952

IMG_8953

IMG_8954

Scratch/Kit Built O Gauge ‘Black 5’

I saw this loco for sale recently and although I do not model BR (M). They were regular visitors to East Anglia and it would give me something a bit different.

I won’t lie, I had to sell 17 various OO loco’s to get this one loco – was it worth it? A resounding ‘yes’. The move from OO to O continues – more sales via Ebay soon!

The owner who I purchased it from thought it was virtually all scratch built and the attention to detail is fantastic. I may change the number and remove some of the weathering – but that can wait.

The Wheels, Motor and Gearbox are certainly to a high specification.

IMG_8932

IMG_8933

IMG_8934

IMG_8935


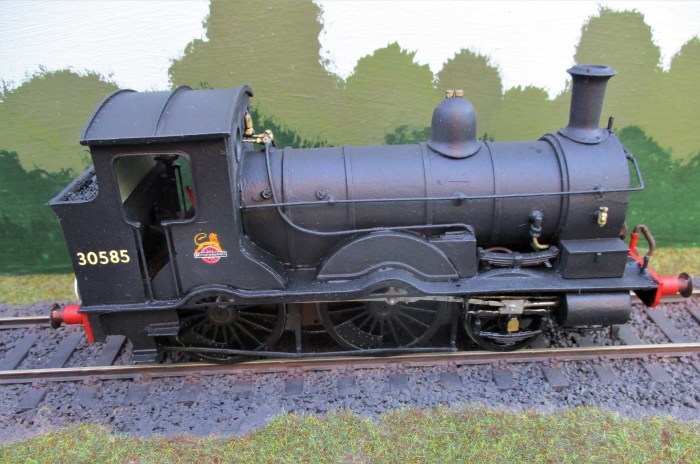
O Gauge Kit Built Class C12 4-4-2T

I saw this for sale recently and fell in love with it. After research I discovered that this loco was based at Bury St Edmunds (Suffolk) 31E During 1955 – that sealed it for me, I purchased it. Although it was a little more than I wanted to pay, after negotiation  it become more attractive.

I will weather it later, but other than that nothing else required.

Some shiny photo’s below.

IMG_8938

IMG_8939

IMG_8940

IMG_8941

O Gauge BR (S) E1R 0-6-2T

This is another Loco I purchased some time ago, however I made a big mistake and did not test run it for several months after purchase. When I did get around to it, it was not as stated at the time of sale – it was not an excellent runner, in fact it was a disaster! When I put it on the track and started it running –  some screws holding the connecting rods to the wheels fell out on both sides of the loco – the threads were virtually gone! The moral of the story – don’t believe all you read, even from supposedly reputable companies. The Loco went in the try again later box!

Again – fast forward over a year!  I have completely stripped down the chassis, purchased replacement parts as needed and after cleaning put it back together. I now had a very passable running loco – by the way the body was very good (reason I purchased it) and only needed minor touch ups here and there.

IMG_9517

IMG_9518

IMG_9519

IMG_9520

O Gauge Beattie Well Tank

I purchased this as a part built kit – chassis made – body part started. This suited me as I consider that chassis making is my worst discipline. The kit duly arrived and it all looked OK, although I never tried the made up chassis. I would say the body was about 50% built to a passable standard. I  finished the build, undercoated, painted and transferred the body. After everything was dry I attached the body to the already finished chassis and tested !!!!  Nothing, the whole lot was dead with not a sign of movement !!!! I put it in the to hard to do at present box !

That was nearly two years ago. After finishing my last project (the B12/3) I looked around for a fill in job – I did not want to do any spraying as it was 34C in my Garage. I found the coolest place I could find indoors and stripped the chassis, separated the motor, wheels, and the gearbox – cleaned the lot, checked the pickups and reassembled. Put it on my test track and it started to run, after a little fettling and adjustment it is now a very passable runner. Lucky I call it !

IMG_9512

IMG_9513

IMG_9515

IMG_9516

IMG_9514

IMG_9501

Note to self – must drill out that solid chimney !!!!

Morale of Story – never give up – revisit difficult jobs.

O Gauge B12/3 Restoration Complete

I have finished the restoration of the B12/3. Its transformation from a rather tatty LNER livery to an early BR livery is complete.

I chose 61516 as it was a Cambridge (31A) engine and in this condition circa 1954. I did not ‘chicken’ out of lining this loco – I simply wanted something a bit different from an early engine.

I added the air pipes, steam pipes and screw couplings. I gave the model a coat of Railmatch ‘satin’ varnish – weathering will follow in time.

Thoroughly enjoyed this project. Buying loco’s that others have given up on, can be worth looking at as a restoration project.

IMG_9489

IMG_9490

IMG_9491

IMG_9492

IMG_9493

Note to self – must clean the finger print off the lens !!!!


O Gauge B12/3 Restoration

I purchased this kit built Loco off a famous auction site. I had to make my mind up as to the standard the kit was built, this can be difficult when you only have three or four photographs to study. My assessment was that the Loco was built to a very good standard and although a good attempt was made at the full LNER apple green livery, it simply was not as good a standard as the build quality.

As I did not want a LNER loco, I had to asses the possibilities of a complete repaint. This done I took the plunge and made an offer – thankfully it was accepted.

After arrival I checked the loco over and after a good clean, thankfully it was a very good runner. I took my time and carefully took the loco apart and started stripping the Body and the Tender, an undercoat followed and two top coats added, and that’s the story so far.

IMG_9475

IMG_9476

IMG_9477

IMG_9478

IMG_9479

IMG_9480

IMG_9481

IMG_9482

One thing for certain, this will not be yet another 61572 – the preserved example. I rather fancy something a bit earlier – early to mid 50’s. I found an excellent photo of a Cambridge engine in 1954, it had the early BR logo and was in plain black, the number, a rather workaday 61516.


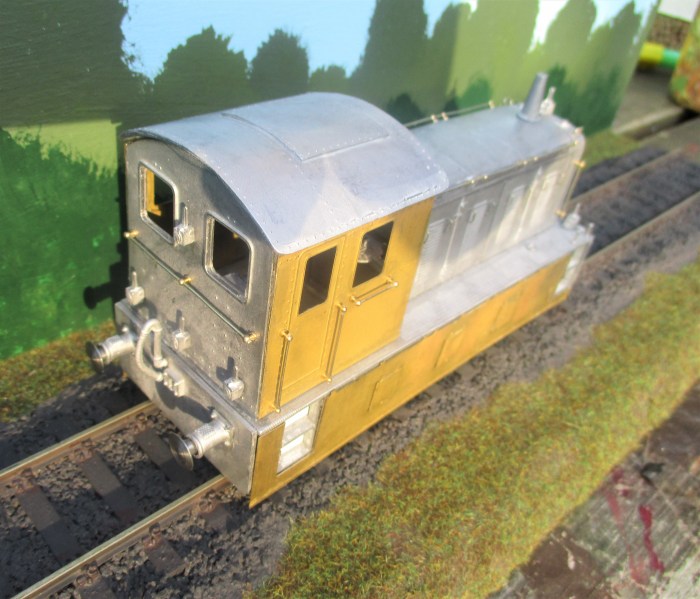
Class O4 Painted and Chassis Made

Well Almost there now – only Glazing and Weathering to do now. Ended up as D2212 when in use at Gt Yarmouth in the early 60’s. Very enjoyable exercise, will post again when completely done and finished. Will photograph with my other Tram Loco, a DY1 in black livery.

IMG_9468

IMG_9471

IMG_9473

IMG_9474

IMG_9469

IMG_9470

I did not bother to add the sandboxes etc as they are all behind the side skirts.


Class 04 Tram Loco update

More work completed on the Tram Loco – Cow catchers added – chassis started – Body undercoated.

I obtained the Wheels, Motor and Gearbox, forgot to get the plunger pick-ups, so it will be Wednesday/Thursday before I can pick the project up again.

Must admit the amalgamated kits have worked quite well – now need a some colour photo’s of D2210 or D2212 to insure that the painting is corrected. Thinking it will be all green, but could be all black if it can be researched.

I realise the Buffers for these Loco’s are wrong – should be ‘chopped round’. The bonnet handrails are different to standard, but to late to correct them sadly. And ‘yes’ I need to add door handles.

IMG_9406IMG_9408IMG_9409IMG_9410IMG_9411

Class O4 Tram Engine Kit

Here we have a composite Loco made up of a 40 year old Vulcan White Metal Kit – plus a 25 year old Impetus etched kit to detail as a Wisbech and Upwell Engine. I decided that I wanted to do an engine that was used on the Quay line at Great Yarmouth. This fell into neither the original Vulcan kit or the W & U Impetus kit.

I worked out which parts of each kit would be used, did my research on the Gt Yarmouth Quay and picked a few candidates that could be modelled.

Basically, the main body, chassis and back and front of the cab is Vulcan, the sides of the cab were taken from the Impetus kit along with all the skirts and cowcatchers.

This turned into a real multi-media kit as I fashioned some more parts from plastikard to fit with the white metal and etched parts, I soldered some joins and super-glued others.

There are some photos below that shows progress so far. The next jobs to do are the cowcatchers, followed by the chassis, motor and gearbox. I guess its about 60% complete.

IMG_9399

IMG_9400

IMG_9401

IMG_9403

IMG_9402

IMG_9404

IMG_9405