After recently posting some photos of Strachan and a conversation on the phone with Les Williams, here are some more photos Les sent me. Great Layout that we made over 20 years ago and kept in great condition by Les.


After recently posting some photos of Strachan and a conversation on the phone with Les Williams, here are some more photos Les sent me. Great Layout that we made over 20 years ago and kept in great condition by Les.

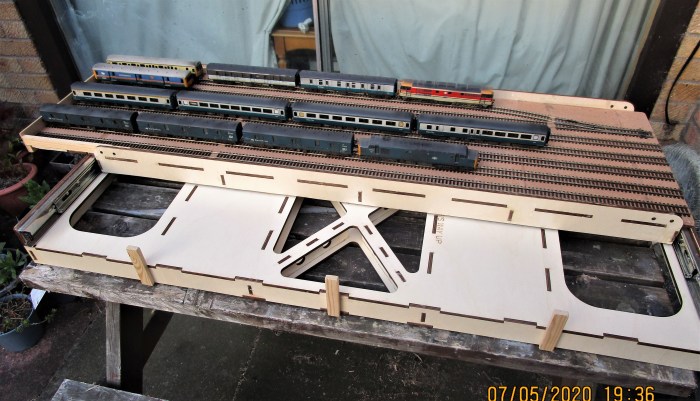
Over the last two days a lot of work has been completed, not least the electrics. A Gaugemaster DC twin track controller and track cleaner has been used, both retrieved from an old layout. The centre three tracks have been split with isolation to allow a total of ten trains to be stored on the traverser.
My method with the electric’s is to have all the tracks on one side permanently coupled (the blue wire) with the full contact on the other track being made by the bolt and loops (the red wire). Simple but it works.
All the track on the first scenic board has been laid and the controller etc. installed. The back board scenic board bases have been added. The second scenic board has been started with a cut out for a river.
The second traverser is not due until Mid June – so after further work on the river and adding track – I will have a break from this un-named layout


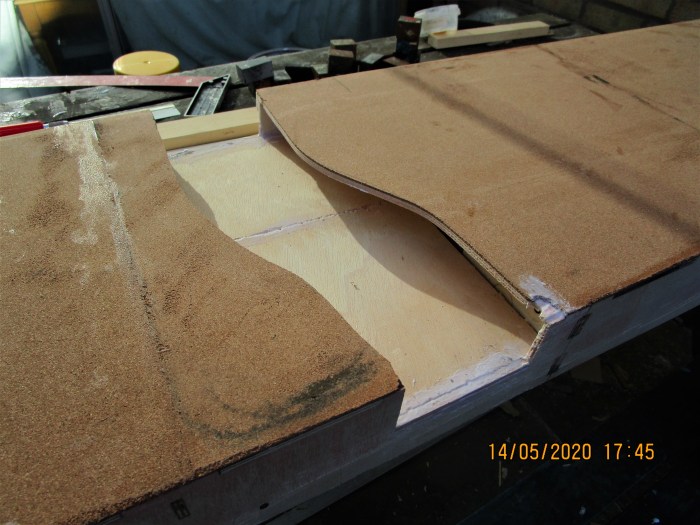


Well, its been quite a day, I turned the four inch extension into a six inch one. I then glued the extension to the traverser, thankfully it worked well. This was first thing this morning and after it was all dry I still had plenty of time left to do some track laying. Out came the gauges to ensure all was equally spaced and track laying commenced.
Below are some photographs of my attempts, the track is lightly pinned so that adjustments can be made, the track will ultimately be glued down when I am 100% happy!


Very happy with the outcome ——–but I have an idea to add another extension to the other end – This is a far more difficult proposition as it needs to be extremely precise.
I have also encountered a possible balance problem when the deck is fully extended – some lead ballast in the base may be necessary.

I would like to welcome Jaeson Pryer to our Model Syndicate. Jaeson is primarily joining us as an operator as our Exhibition Diary gets too much for the four of us. Jaeson has been/is a member of several Model Railway Clubs and is experienced in most Railway and Modelling subjects including Exhibition Planning and Layout Operations. Jaeson does not have an Exhibition Layout at present and his main part of our very diverse hobby is LEGO trains and accessories. I will therefore be adding a ‘LEGO Railway Display’ to our list of available layouts on our ‘Exhibition Layouts’ on this website.
Welcome to the ‘Norfolk Railway Modelling Syndicate’

As a famous TV program once said – ‘and now for something completely different’.
Yesterday I purchased this book from Bob Pearman Books as it was local to me and I worked for 30 years near the original route of this line ‘ The Waveney Valley Railway’.
This is truly a magnificent Book by Peter Paye a truly excellent researcher. On arriving home I had a quick glance through the book and in the section on ‘bridges’ I remembered something! About 20 years ago I purchased a bridge plate for £5 that was supposedly from the Waveney Valley line. Having no way of researching at the time it has just been moved around various Sheds, getting dirtier and covered in cobwebs.
In fact I never knew whether the number was 1191 or 1611. It turns out to be 1191 and was on a bridge between Bungay and Ditchingham. Mystery solved at last thanks to this very informative book. By the way the plate is still in very weathered GE Livery.


This is another Loco I purchased some time ago, however I made a big mistake and did not test run it for several months after purchase. When I did get around to it, it was not as stated at the time of sale – it was not an excellent runner, in fact it was a disaster! When I put it on the track and started it running – some screws holding the connecting rods to the wheels fell out on both sides of the loco – the threads were virtually gone! The moral of the story – don’t believe all you read, even from supposedly reputable companies. The Loco went in the try again later box!
Again – fast forward over a year! I have completely stripped down the chassis, purchased replacement parts as needed and after cleaning put it back together. I now had a very passable running loco – by the way the body was very good (reason I purchased it) and only needed minor touch ups here and there.


Well, here it is after a visit to the painting section for a medium weathering session. Just about what I wanted – but may revisit again later.


To show my commitment to move from OO to O Gauge here is a photo of the same Class 26 Loco in both gauges.
I spent most of yesterday adding the full yellow front on the O gauge Model, hand brushed two undercoats and four topcoats. The model was then detailed and numbered as D5335, the only Loco I can find in this Class with a warning panel like this.
After finishing I put the OO Class 26 on Ebay. Here are some photo’s of the Loco’s for the one and only time!!!!


This is a light to medium weathering of a standard Heljan Class 31. I have to say that this is the third Loco I have done in this livery and they weather very well and certainly look the part, I love the subtle blending over the lower stripes, and its easy to achieve. Must get around to weathering my Green Class 31 (30) and looking forward to working on the new D5578 and D5579 coming out before Xmas (Hopefully).


At the Bressingham Narrow Gauge Exhibition I noticed that a trader was selling a jig to make tree armatures. The trader Norfolk Heath Works was selling a kit that included the jig, reel of wire and a jar of latex. I duly purchased a kit and the next day out came the jig to ‘have a go’. The jig is graduated in feet for the height of the tree from ground level, this covers N Gauge, OO Gauge and O Gauge. The kit costs £15.
You simply wind the wire around the steel pegs until you have done enough for your chosen height, remove from the jig and the cut the tops of the loops. It is then a case of twisting the wire into the trunk and branches. when satisfied keep coating with latex until you are happy with the thickness and shape. Even after coating with latex the armature is fully bendable.
Below are some photo’s of my first attempts of various types and sizes of armatures. I will post further when foliage is added.


